Can I Install A Smart Lock Myself?
As smart home technology becomes more accessible, many homeowners are asking: Can I install a smart lock myself? The short answer is yes—for most standard doors and modern smart lock models, a DIY installation is not only possible but often straightforward. However, success depends on understanding the hardware, your door's configuration, and the specific features of the lock you're installing.
Understanding Your Door's Lock Preparation: Is Your Door Ready for a Smart Deadbolt?
Before picking up a screwdriver, it's essential to assess whether your door is compatible with a smart lock. Most interior and exterior residential doors in North America follow standard lock preparation, which makes retrofitting a smart wifi deadbolt lock much easier.
The standard door prep includes:
A 2-1/8 inch bore hole (the large hole in the face of the door)
A 1-inch cross bore (the smaller hole that runs from the edge of the door into the larger bore)
A backset of either 2-3/8 inches or 2-3/4 inches (measured from the edge of the door to the center of the bore)
These dimensions are designed to accommodate most electronic door deadbolt models. If your door matches these specs—and most do—you're likely good to go. However, older homes or custom doors may deviate from these standards, requiring minor adjustments or special mounting kits.
Additionally, ensure your door is solid-core (wood, metal, or composite). Hollow-core doors, often used for interior rooms, may not provide enough structural support for a heavy-duty smart keyless deadbolt, especially one with Wi-Fi components and a built-in motor.
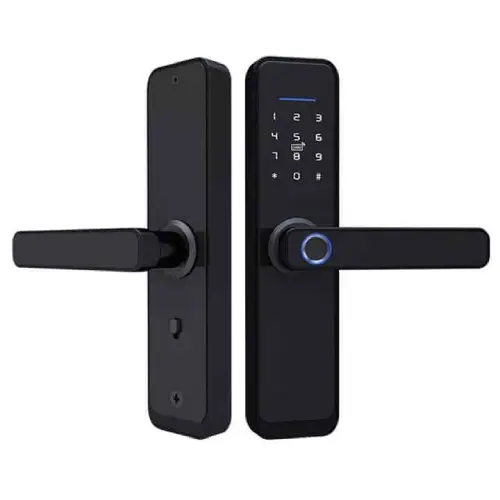
Step-by-Step: How to Replace a Traditional Deadbolt with a Wifi Door Deadbolt
Replacing a mechanical deadbolt with a wifi door deadbolt is typically a two-part process: removing the old hardware and installing the new smart components. Here's a general overview:
Remove the existing deadbolt – Use a screwdriver to detach the interior and exterior trim, then slide out the latch mechanism from the edge of the door.
Check alignment and fit – Before installing the new lock, dry-fit the components to ensure the smart wifi deadbolt lock aligns with the bore and cross bore holes.
Install the latch and exterior assembly – Insert the new latch into the edge of the door, securing it with screws. Attach the exterior portion (usually the keypad or touch panel) and connect it to the interior assembly.
Connect wiring (if applicable) – Some advanced electronic door deadbolt models require a small wire connection between the front and back units. This is common in locks with integrated Wi-Fi antennas or touchscreen interfaces.
Secure the interior housing – Attach the interior assembly, which houses the motor, battery compartment, and Bluetooth/Wi-Fi module.
Insert batteries and test – Most smart locks run on AA or AAA batteries. Install them, then test the lock manually and via the app.
The entire process usually takes 20 to 45 minutes for someone with basic tools and moderate DIY experience.
Smart Keyless Deadbolt Setup: Pairing and App Configuration
Once the physical installation is complete, the next step is configuring the smart keyless deadbolt through a mobile app. This is where features like remote access, user codes, and integration with smart home systems come into play.
Most smart wifi deadbolt lock models use a companion app (available for iOS and Android) to:
Set up admin and guest access codes
Enable Wi-Fi and Bluetooth connectivity
Receive lock/unlock notifications
Integrate with voice assistants (e.g., Alexa, Google Assistant)
During setup, the app will guide you through connecting the lock to your home Wi-Fi network. This is a critical step—without a stable connection, remote access features won't work. Ensure you're using a 2.4 GHz network, as most smart locks don't support 5 GHz bands.
Some models, like those designed with simplicity in mind (similar to Filta's approach), use QR code scanning or NFC pairing to speed up the process, reducing the risk of configuration errors.
Common DIY Installation Mistakes to Avoid
Even experienced DIYers can run into issues when installing a wifi door deadbolt. Here are some common pitfalls:
Misaligned latch or strike plate – If the bolt doesn't slide smoothly into the door frame, the lock may not engage properly. Adjust the strike plate position if needed.
Weak Wi-Fi signal at the door – Exterior doors, especially those far from the router, may have poor signal strength. Consider using a Wi-Fi extender or mesh network to maintain connectivity.
Incorrect backset measurement – Installing a lock with the wrong backset can prevent the bolt from extending fully. Double-check your door's measurement before purchasing.
Forgetting to test all access methods – After setup, test keypad entry, app control, Bluetooth proximity unlock, and any physical key override to ensure everything works.
Taking time to troubleshoot during installation can prevent frustration later.
Battery Management and Long Term Maintenance for Electronic Door Deadbolts
A smart keyless deadbolt relies on consistent power to function. Most models run on 4 AA batteries, which can last 6 to 12 months depending on usage and connectivity features.
To avoid unexpected lockouts:
Replace batteries proactively, even if the app hasn't issued a low-battery alert.
Keep spare batteries on hand.